Cooking a whole chicken in an air fryer is one of the most rewarding and efficient ways to prepare a flavorful meal. The circulating hot air creates a beautifully crisp, golden-brown skin while sealing in the juices, resulting in tender and succulent meat. This method is faster than traditional roasting and requires minimal effort, making it ideal for both beginners and experienced home cooks.
Ingredients
- 1 whole chicken (about 1.5 to 2 kg / 3 to 4.5 lbs)
- 2 tablespoons olive oil
- 1 teaspoon garlic powder
- 1 teaspoon onion powder
- 1 teaspoon sweet paprika (or smoked paprika for deeper flavor)
- 1 teaspoon dried herbs (rosemary, thyme, oregano, or a blend)
- Salt and freshly ground black pepper, to taste
- 1 lemon (optional, for stuffing the cavity)
Equipment Needed
- Air fryer (large enough to fit a whole chicken)
- Paper towels
- Small mixing bowl
- Tongs or spatula
- Meat thermometer (strongly recommended)
Step 1: Preparing the Chicken
Start by removing the chicken from its packaging. Check the cavity for any giblets (these are often included inside) and remove them if present. You can discard them or save them for making broth.
Rinse the chicken lightly under cold water if desired, though this is optional. More importantly, dry the chicken thoroughly using paper towels. This step is essential because moisture on the skin prevents crisping. The drier the surface, the better the final texture.
Take a moment to trim any excess fat or loose skin, especially around the cavity and neck area. This improves both presentation and cooking consistency.
Step 2: Seasoning the Chicken
In a small bowl, combine the olive oil, garlic powder, onion powder, paprika, dried herbs, salt, and pepper. Mix until it forms a slightly thick, aromatic paste.
Rub this mixture evenly over the entire chicken. Make sure to coat all sides, including the legs and wings. For even better flavor, gently loosen the skin over the breast and rub some of the seasoning directly underneath. This helps infuse the meat itself, not just the outer layer.
Season the inside cavity lightly with salt and pepper. If you are using lemon, cut it in half and place it inside the cavity. The lemon releases steam and subtle citrus notes during cooking, enhancing the overall flavor without overpowering the seasoning.
Step 3: Preheating the Air Fryer
Preheat your air fryer to 180°C (350°F) for about 5 minutes. Preheating ensures the chicken starts cooking immediately when placed inside, which helps lock in juices and promotes even browning.
Step 4: Cooking the Chicken
Place the chicken breast-side down in the air fryer basket. Starting with the breast facing down allows the juices to flow into the breast meat, preventing it from drying out during the first stage of cooking.
Cook at 180°C (350°F) for 30 minutes.
After 30 minutes, carefully flip the chicken so the breast side is facing up. Use tongs or two utensils for stability, as the chicken will be hot and slightly delicate at this stage.
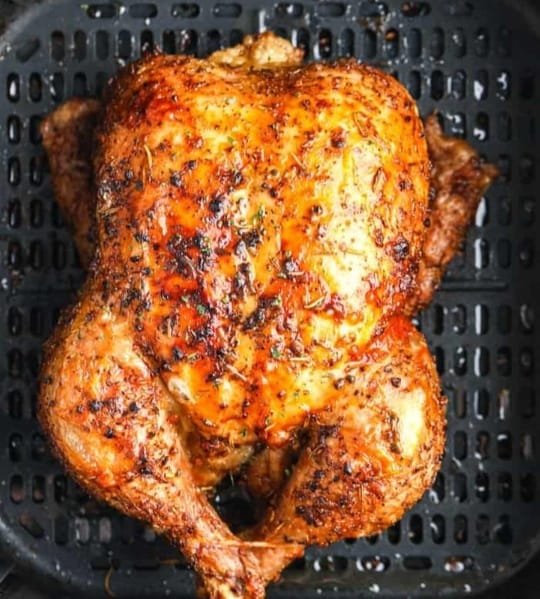
Continue cooking for an additional 25 to 30 minutes. During this time, the skin on the breast will become golden and crispy.
Cooking times may vary depending on the size of your chicken and the power of your air fryer. Smaller chickens may cook faster, while larger ones may require a bit more time.
Step 5: Checking for Doneness
The most reliable way to check if your chicken is fully cooked is by using a meat thermometer. Insert it into the thickest part of the breast and the inner thigh, avoiding the bone.
The chicken is safe to eat when it reaches an internal temperature of 75°C (165°F).
If you do not have a thermometer, you can check by piercing the thickest part of the thigh. The juices should run clear. If they appear pink, the chicken needs more time.
Step 6: Resting the Chicken
Once the chicken is fully cooked, remove it from the air fryer and place it on a cutting board or serving platter. Let it rest for 5 to 10 minutes before carving.
Resting allows the juices to redistribute throughout the meat. Cutting too soon will cause the juices to escape, resulting in drier chicken.
Step 7: Serving Suggestions
Carve the chicken into portions: breasts, thighs, drumsticks, and wings. Serve with your favorite sides such as:
- Roasted vegetables
- Mashed or roasted potatoes
- Fresh salad
- Rice or couscous
You can also drizzle the chicken with its own juices for extra flavor.
Extra Tips for Best Results
1. For Extra Crispy Skin
Increase the temperature to 200°C (400°F) during the last 5 minutes of cooking. Keep a close eye to prevent burning.
2. Avoid Overcrowding
Make sure your air fryer has enough space for air to circulate around the chicken. If it is too large, consider using a slightly smaller bird.
3. Truss the Chicken (Optional)
Tying the legs together with kitchen twine helps the chicken cook more evenly and keeps its shape compact.
4. Use a Dry Rub Overnight
For even deeper flavor, season the chicken and let it sit uncovered in the refrigerator for several hours or overnight. This dries out the skin further and enhances crispiness.
5. Add Aromatics
In addition to lemon, you can add garlic cloves, onion halves, or fresh herbs inside the cavity for more complex flavors.
Why This Method Works
Air fryers function by circulating hot air rapidly around the food, similar to a convection oven but more concentrated. This high-speed airflow removes moisture from the surface while cooking the interior evenly. The result is a crisp exterior without the need for excessive oil.
Starting the chicken breast-side down protects the lean breast meat from drying out. Flipping halfway ensures even browning and a visually appealing finish.
Storage and Reheating
Leftover chicken can be stored in an airtight container in the refrigerator for up to 3 to 4 days.
To reheat, place the pieces back in the air fryer at 160°C (320°F) for 5 to 8 minutes. This helps restore crispiness without drying out the meat.
You can also shred leftover chicken for use in sandwiches, salads, wraps, or soups.